Fixing a dripping tap
Leaking taps or dripping taps can quickly become a real inconvenience in the home. Not only are they famously annoying, but they can waste a huge amount of water and money. However a dripping tap is usually easy to fix, and doesn’t need a call out to a plumber.
Where the leak is coming from will determine the type of repair you need to make.
Hot water valves will have a red bottom seal, and cold water valves will have a blue bottom seal. The difference between the two is the direction in which the valve turns.
Before you start any plumbing work, turn off your water supply. Then run off any excess water through the pipes. Before you start to dismantle your tap you can put a plug into the sink so you don’t accidentally lose any small parts or screws.
It’s important not to overtighten any washers or valves when you replace them, as this can cause excessive stress on the valve and will soon lead to dripping again.
How to fix a compression valve tap
Step 1
If your tap has a handle cap then carefully remove it to access the screw within. Unscrew to remove the handle itself. Then unscrew the rest of the valve cover.

Step 2
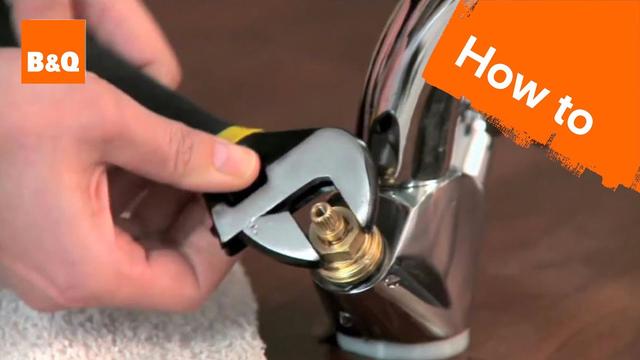
Use an adjustable spanner to loosen the valve, then remove it.
Step 3
Hold the valve steady with an adjustable spanner and use a screwdriver to remove the screw that holds the washer in place. Replace the washer.
Step 4
Once you’ve done this, screw the valve, valve cover and tap handle back into place, and re-fit the handle cap.
How to fix a ceramic disc valve tap
Step 1
Remove the handle cap to expose the top of the valve. You may need an Allen key for this, depending on the style of the tap.
Step 2
Use an adjustable spanner to loosen and remove the valve.
Step 3
Check the ceramic disc valve for damage or grime, and clean or replace the valve. Then secure the valve and handle cap back into position.
How to replace a tap valve O-ring
Step 1
Depending on your type of tap, remove the valve using the instructions already provided.
Step 2
Carefully remove the worn or damaged O-ring with a screwdriver. Then roll the replacement O-ring into position and secure the valve back in the tap.
How to replace a tap spout O-ring
Step 1
Accessing the tap from below the sink, use a box spanner to loosen the nut that secures the tap to the sink.
Step 2
Twist the tap round so it’s facing you, then use a screwdriver to remove the small grub screw.
Step 3
Lift the spout so you can access the O-ring, which is the rubber ring at the base of the spout. Carefully remove the O-ring with the help of a screwdriver. Then roll the replacement O-ring into position.
Step 4
To replace the spout, line up the marker on the spout with the groove in the tap body, and slot the spout back into position. Secure the tap in place by re-tightening the grub screw and the nut underneath the sink.
